I'm currently in the process of restoring a 1984 Tomy Omnibot, one of the most iconic consumer robots of the 1980s. This little guy was the dream of every kid who watched sci-fi movies and wanted their own robot butler. Now, 40+ years later, I'm bringing it back to life.
A Brief History
The Tomy Omnibot was released in 1984 and became an instant sensation. It could move via remote control, had a built-in cassette player for recording and playing back messages, and featured a serving tray to bring you drinks and snacks. For its time, it was incredibly advanced. A glimpse into a future where robots would be part of everyday life.
These robots originally retailed for around $600 (equivalent to over $1,800 today), making them a premium toy. Many didn't survive the decades, which makes finding one in restorable condition a real treasure.
The Teardown
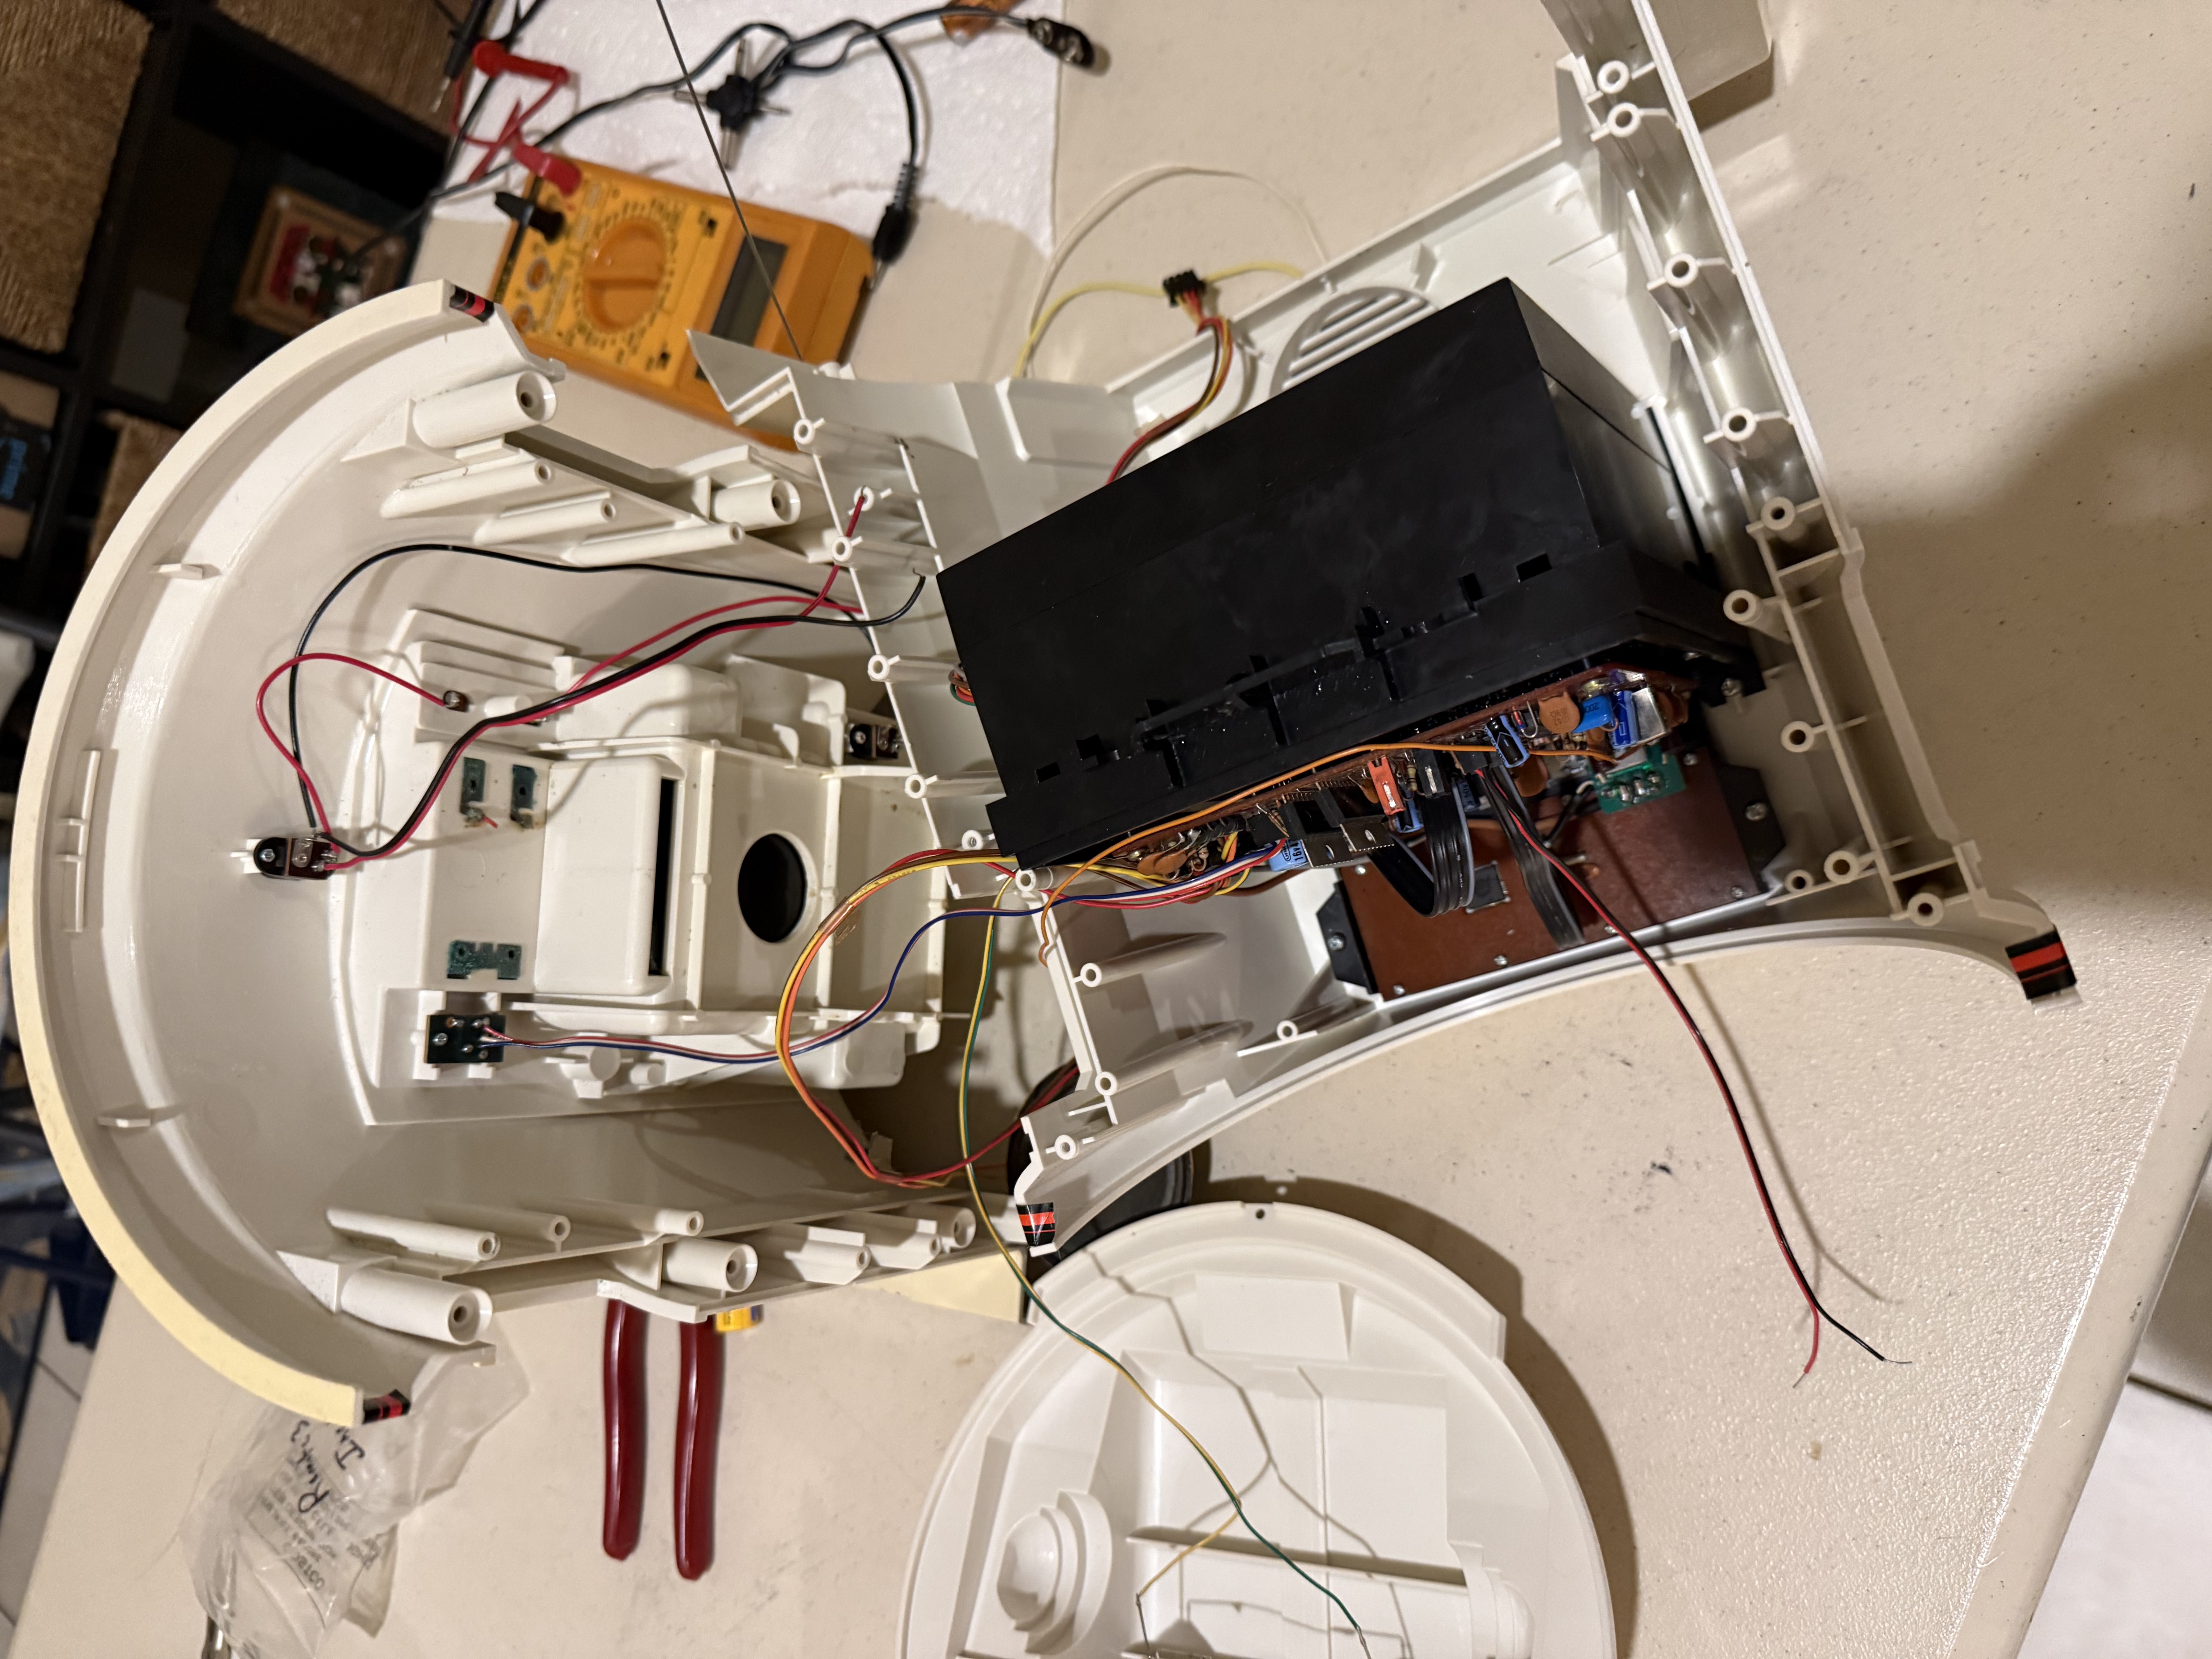
The first step in any restoration is understanding what you're working with. I completely disassembled the Omnibot to assess the condition of each component.
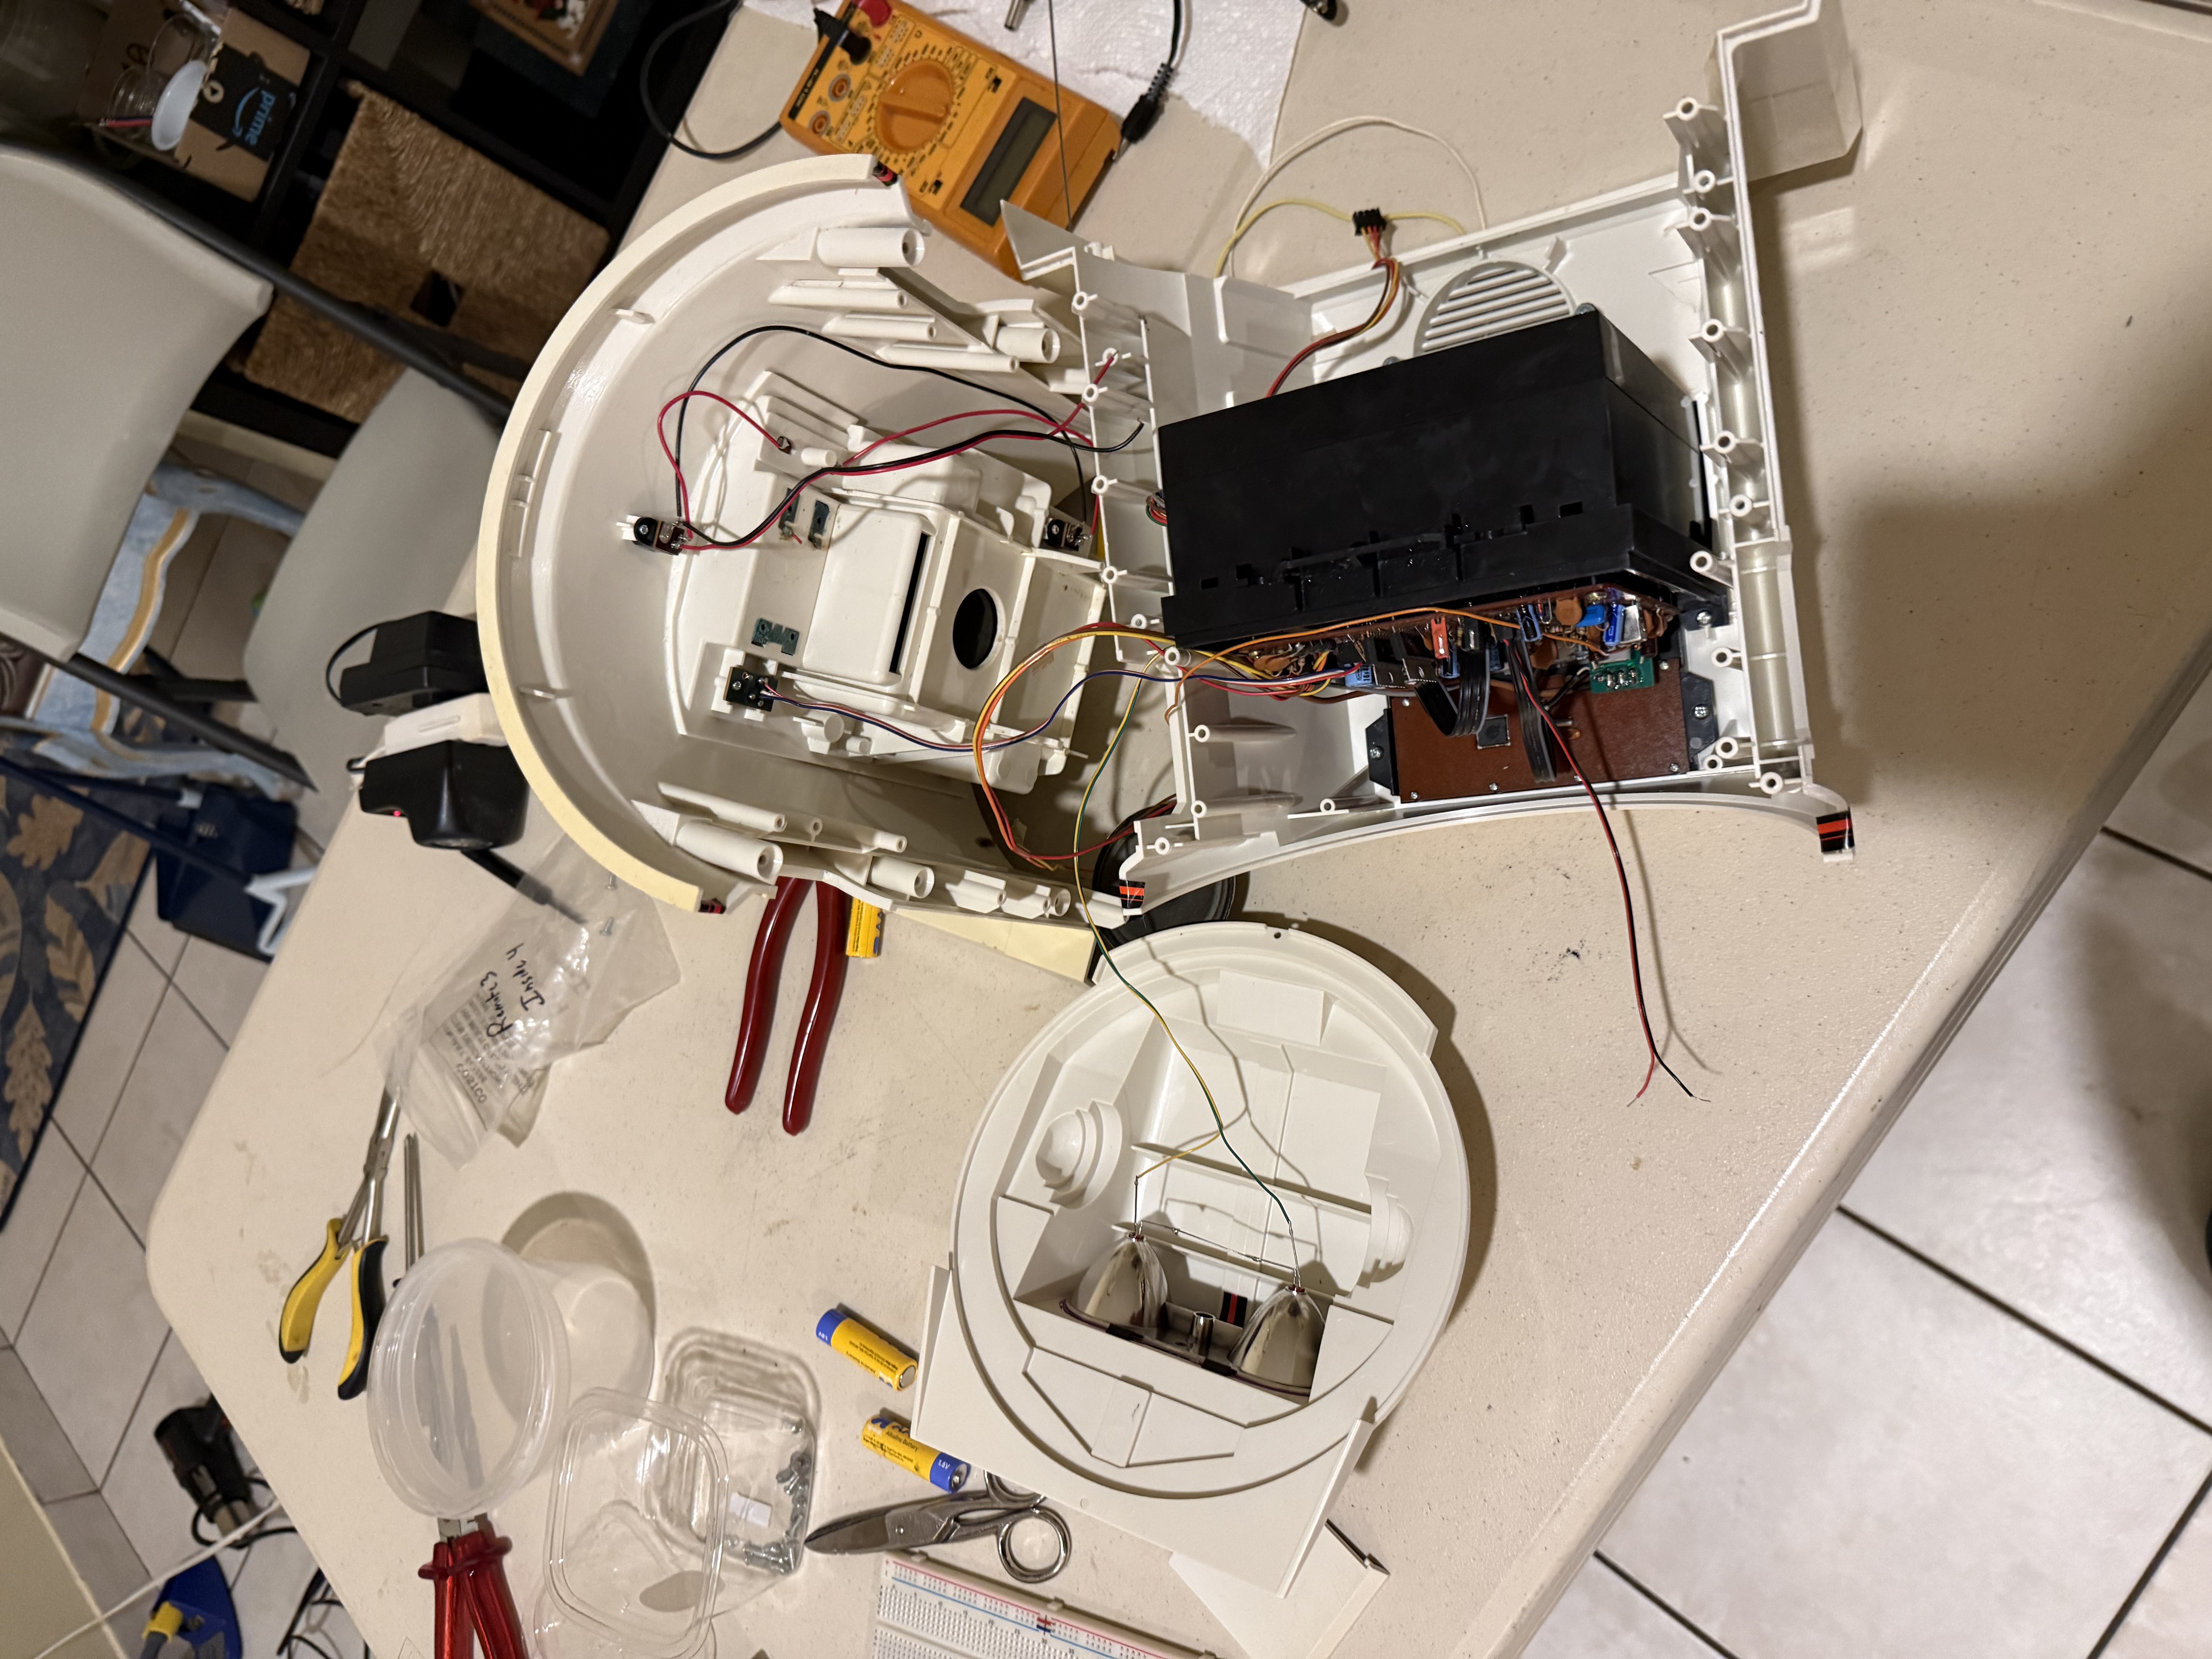
The plastic shell is in remarkably good condition for a 40-year-old robot. Some yellowing from age, but no major cracks or breaks. The internal mechanics tell a different story though. Decades of sitting idle have taken their toll on the drive system and electronics.
Battery Acid Damage
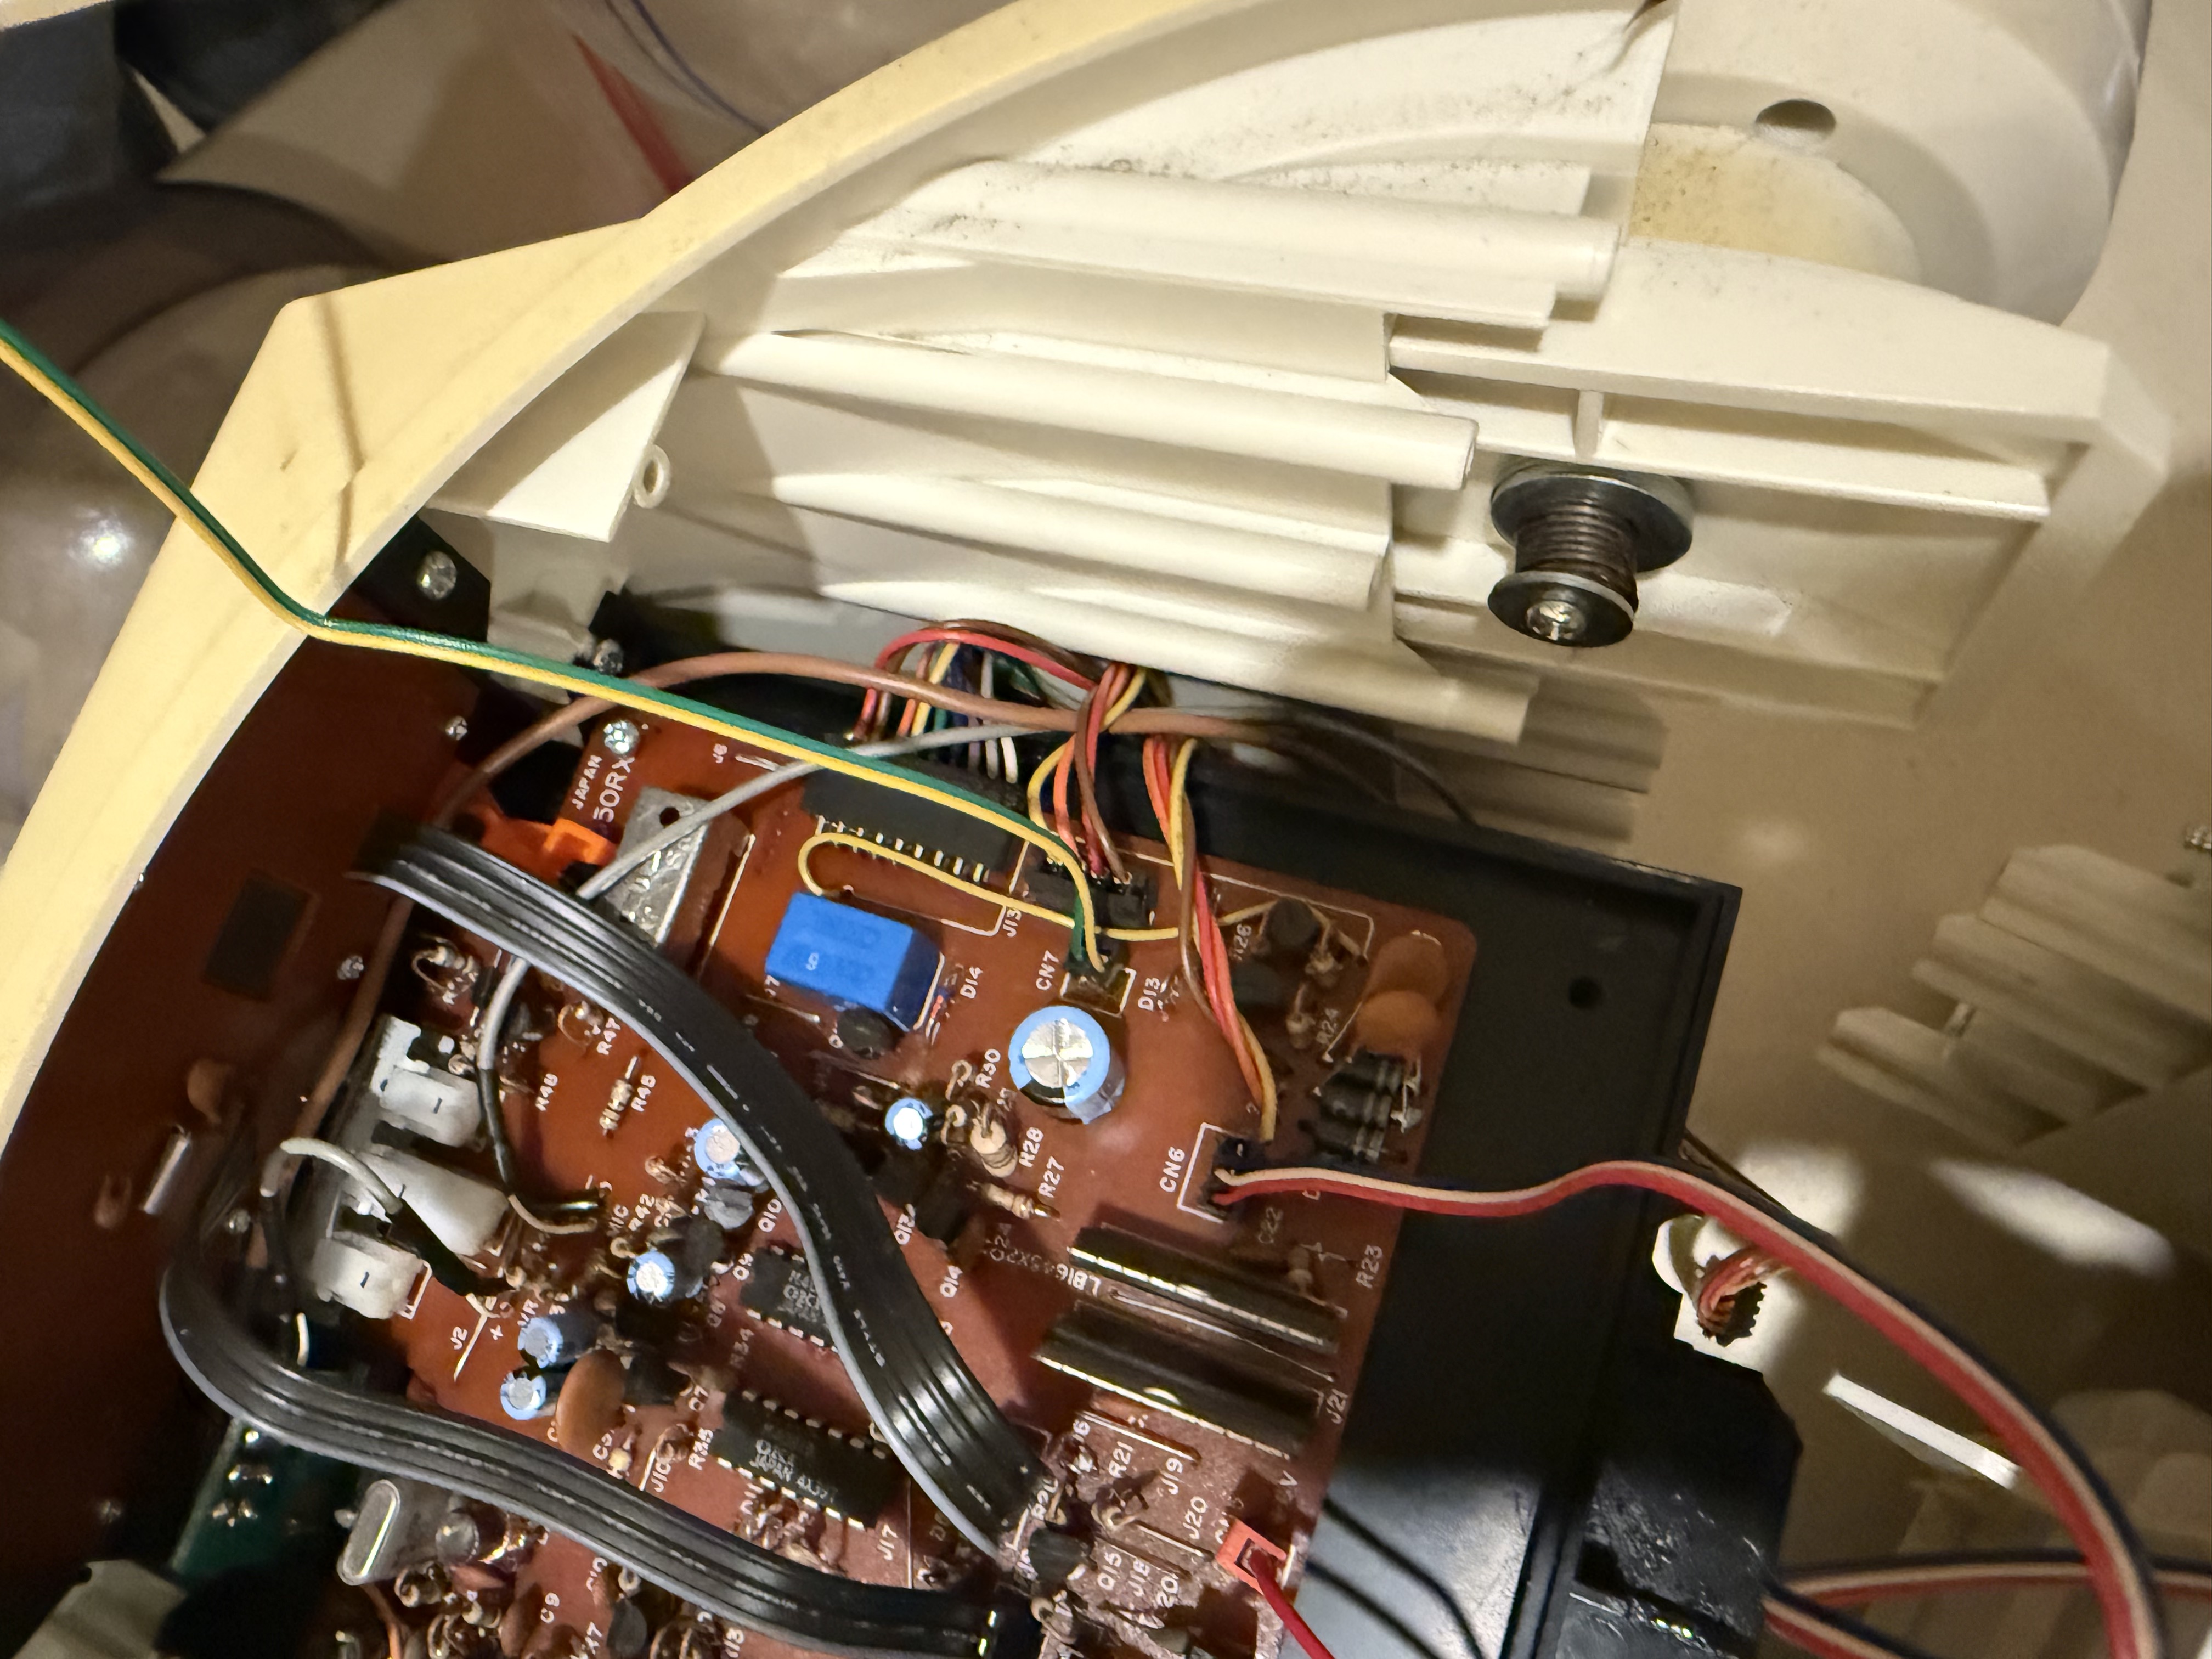
The biggest enemy of vintage electronics isn't age, it's leaking batteries. Most of the damage to this Omnibot came from battery acid that had leaked into the robot's internals over the years. The corrosive acid had eaten away at traces on the PCB and destroyed several wire connections.
Restoring acid-damaged electronics requires patience. I spent hours doing deep cleaning with isopropyl alcohol and a toothbrush, carefully removing the crusty corrosion from the circuit boards. Several traces had been completely eaten through, requiring careful resoldering to restore continuity. It's tedious work, but absolutely essential for bringing vintage electronics back to life.
The Original Electronics
Opening up the Omnibot reveals some beautiful vintage electronics. The main PCB is a work of art from the era of through-hole components and hand-routed traces.
The board features discrete logic ICs, motor drivers, and the audio circuitry for the cassette player. It's fascinating to see how engineers solved problems with the technology available at the time. Today we'd use a single microcontroller for all of this functionality.
Fixing the Remote Control
The wireless remote is essential for operating the Omnibot. Unfortunately, the remote suffered the same fate as the robot. Battery acid had leaked onto the PCB, corroding the contacts and damaging traces.
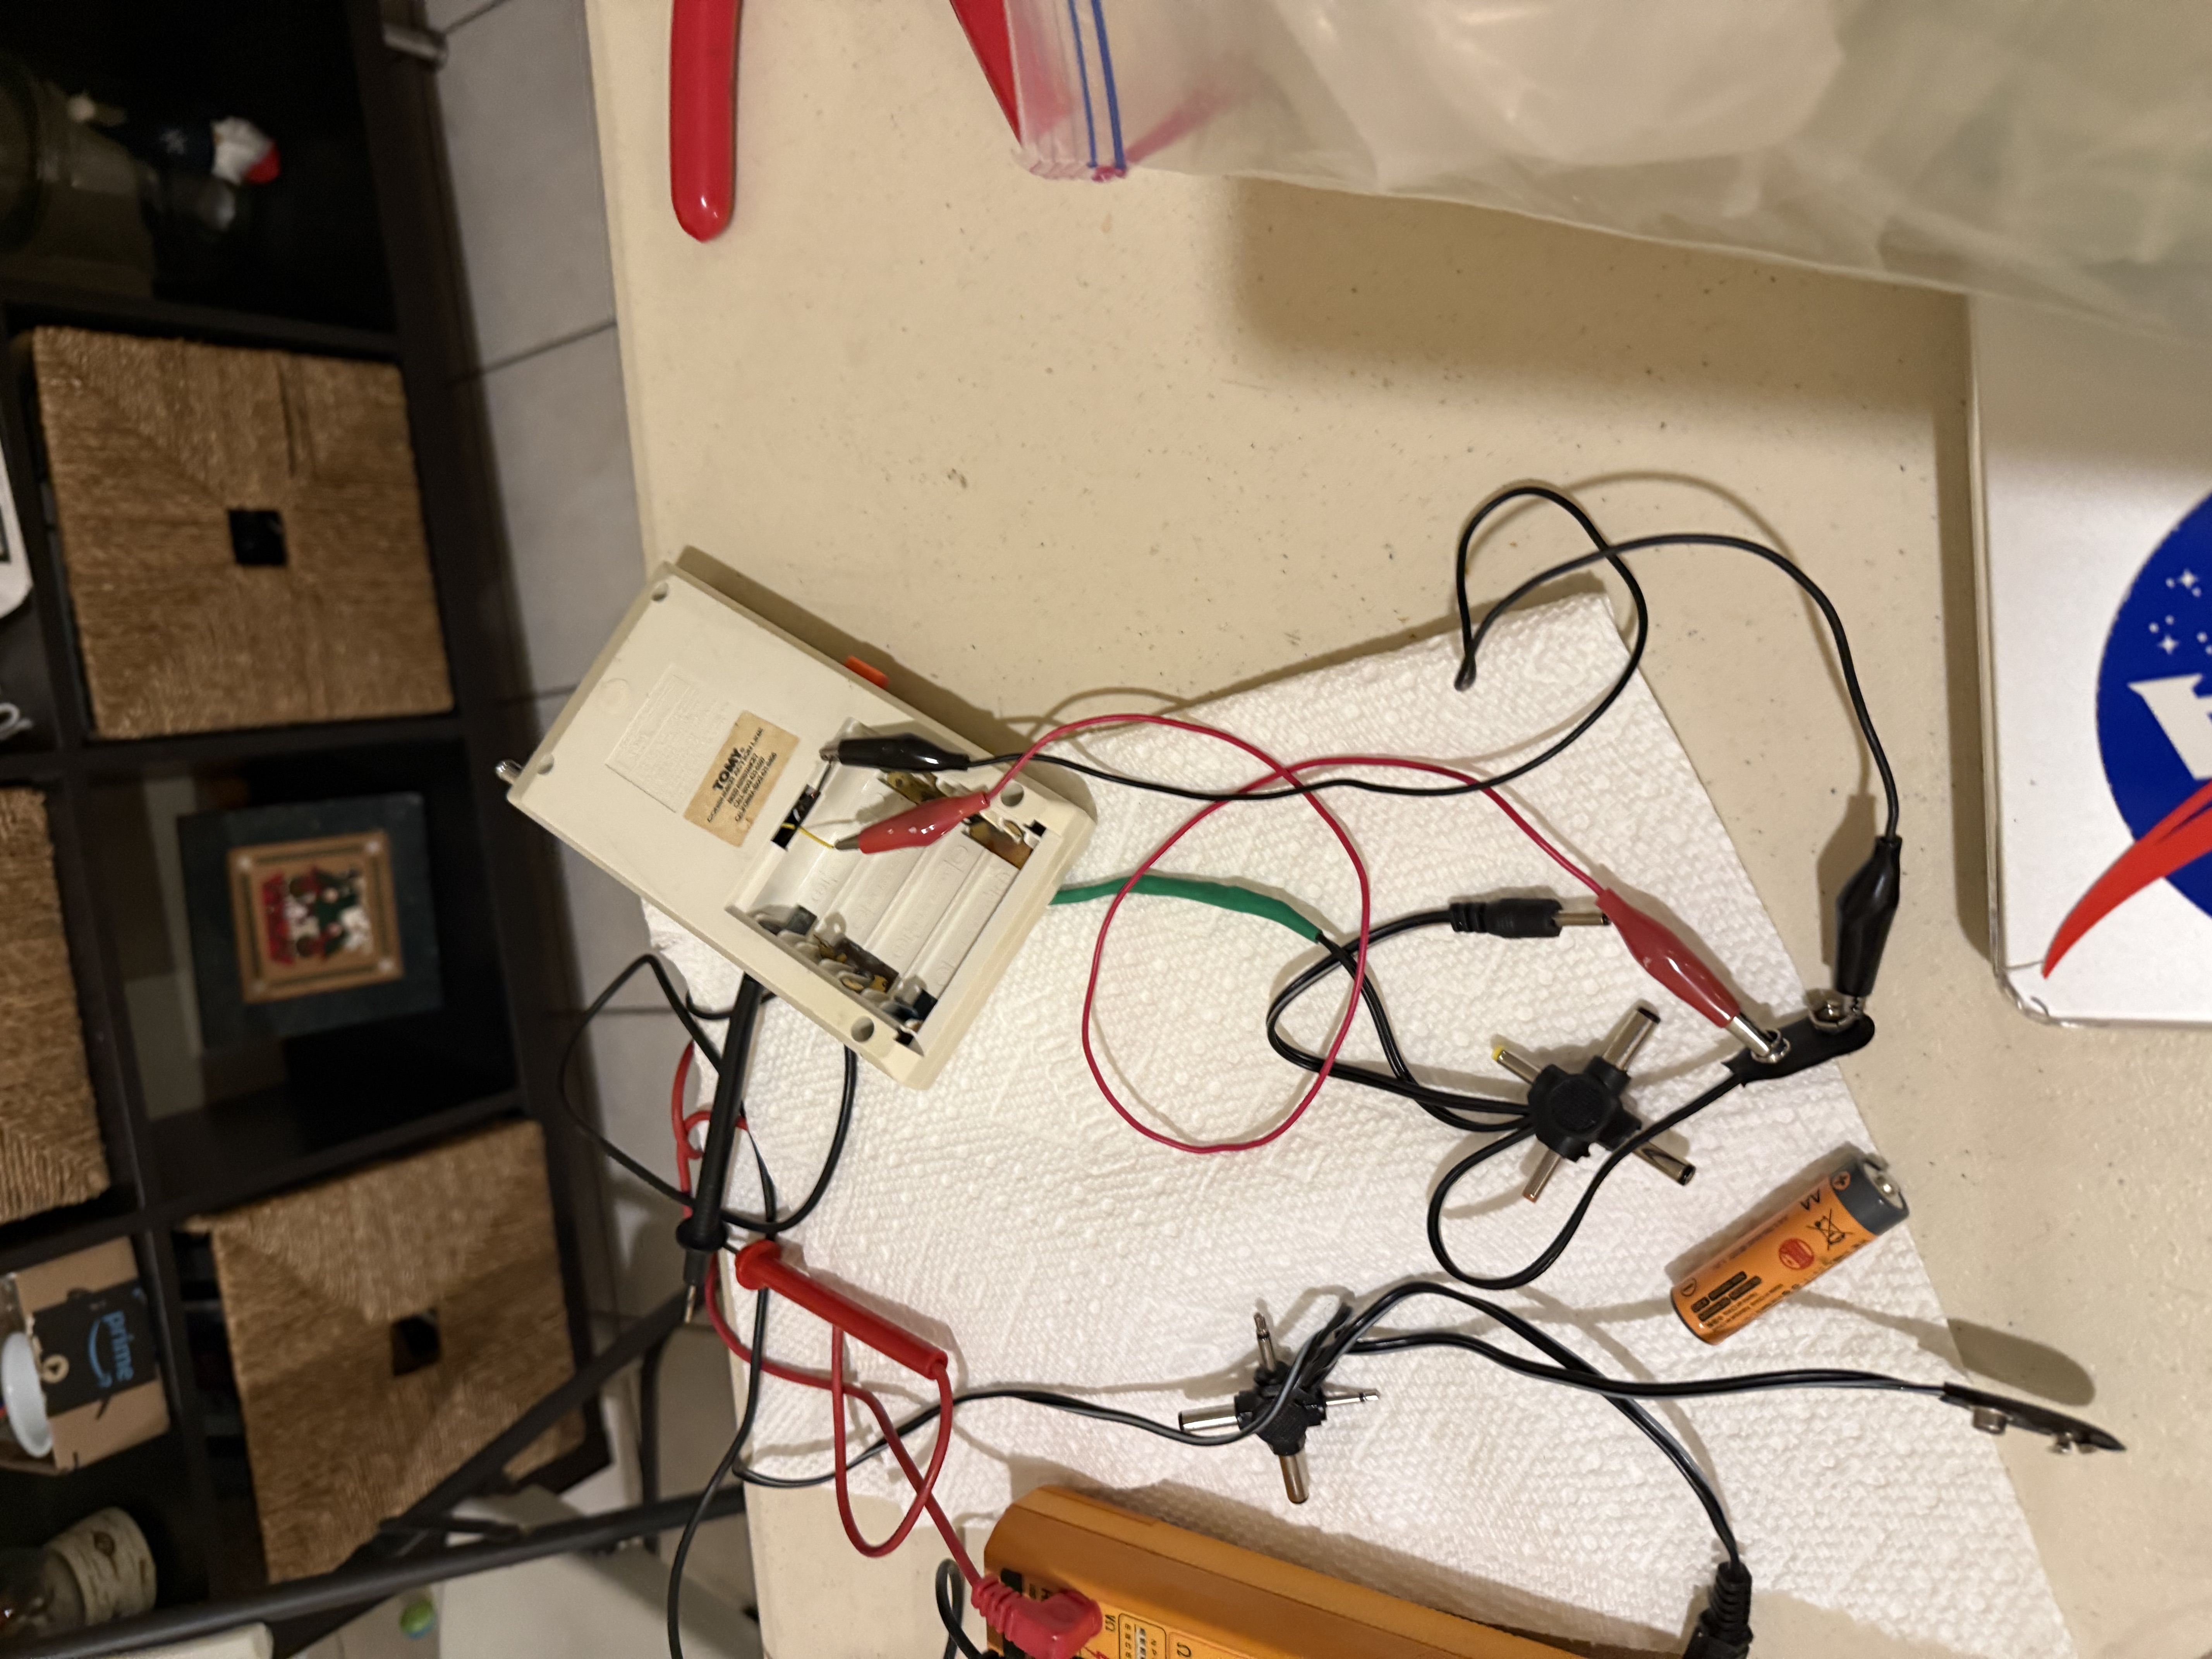
After a thorough deep cleaning and some careful resoldering of damaged connections, I was able to get the remote working again. The satisfying click of those chunky 80s buttons brings back memories of an era when electronics were built to last. Just remember to take the batteries out when storing them!
First Signs of Life
After cleaning connections and replacing corroded wires, the moment of truth arrived. Power on. The motors spin, the head turns, and the Omnibot takes its first drive in probably decades.
The excitement was short-lived though. After that first drive, the original rubber wheels completely disintegrated. Forty years of age had turned the rubber brittle, and it simply crumbled apart. I've got the drive motors lubricated and running smoothly now, but I'm waiting on 3D printed replacement wheels to get it rolling again.
The Alarm Clock Display
The Omnibot featured a built-in alarm clock display, a fun feature that let you program wake-up times for your robot butler. Unfortunately, this is where most of the 3A battery leak damage occurred. The acid pooled right on the display circuitry, causing significant corrosion.
I'm currently hunting down a replacement part for the damaged display component. Sourcing parts for 40-year-old electronics is always a challenge. It's a mix of eBay hunting, donor units, and sometimes getting creative with modern equivalents. Once I find that part, I should be able to get the clock display functioning again.
What's Next
The restoration is ongoing. Here's my current status:
- Drive system — Motors lubricated, waiting on 3D printed wheels
- Alarm clock display — Searching for replacement part damaged by battery acid
- Clean and restore the shell — Remove yellowing with retrobright treatment (maybe)
- Restore the cassette mechanism — New belts and cleaning the tape heads
- Upgrade options — Considering adding a Bluetooth cassette tape to add audio while keeping everything original
- Full functional test — All features working as intended
There's something special about bringing vintage tech back to life. These machines represent the dreams and engineering of a previous generation. The Omnibot was a promise of a robotic future. While we didn't get robot butlers in every home, the spirit of that dream lives on in the maker movement.
Continue to Part 2 where I add Bluetooth control and give this 80s icon its voice back.